- Users are individual accounts in your organization.
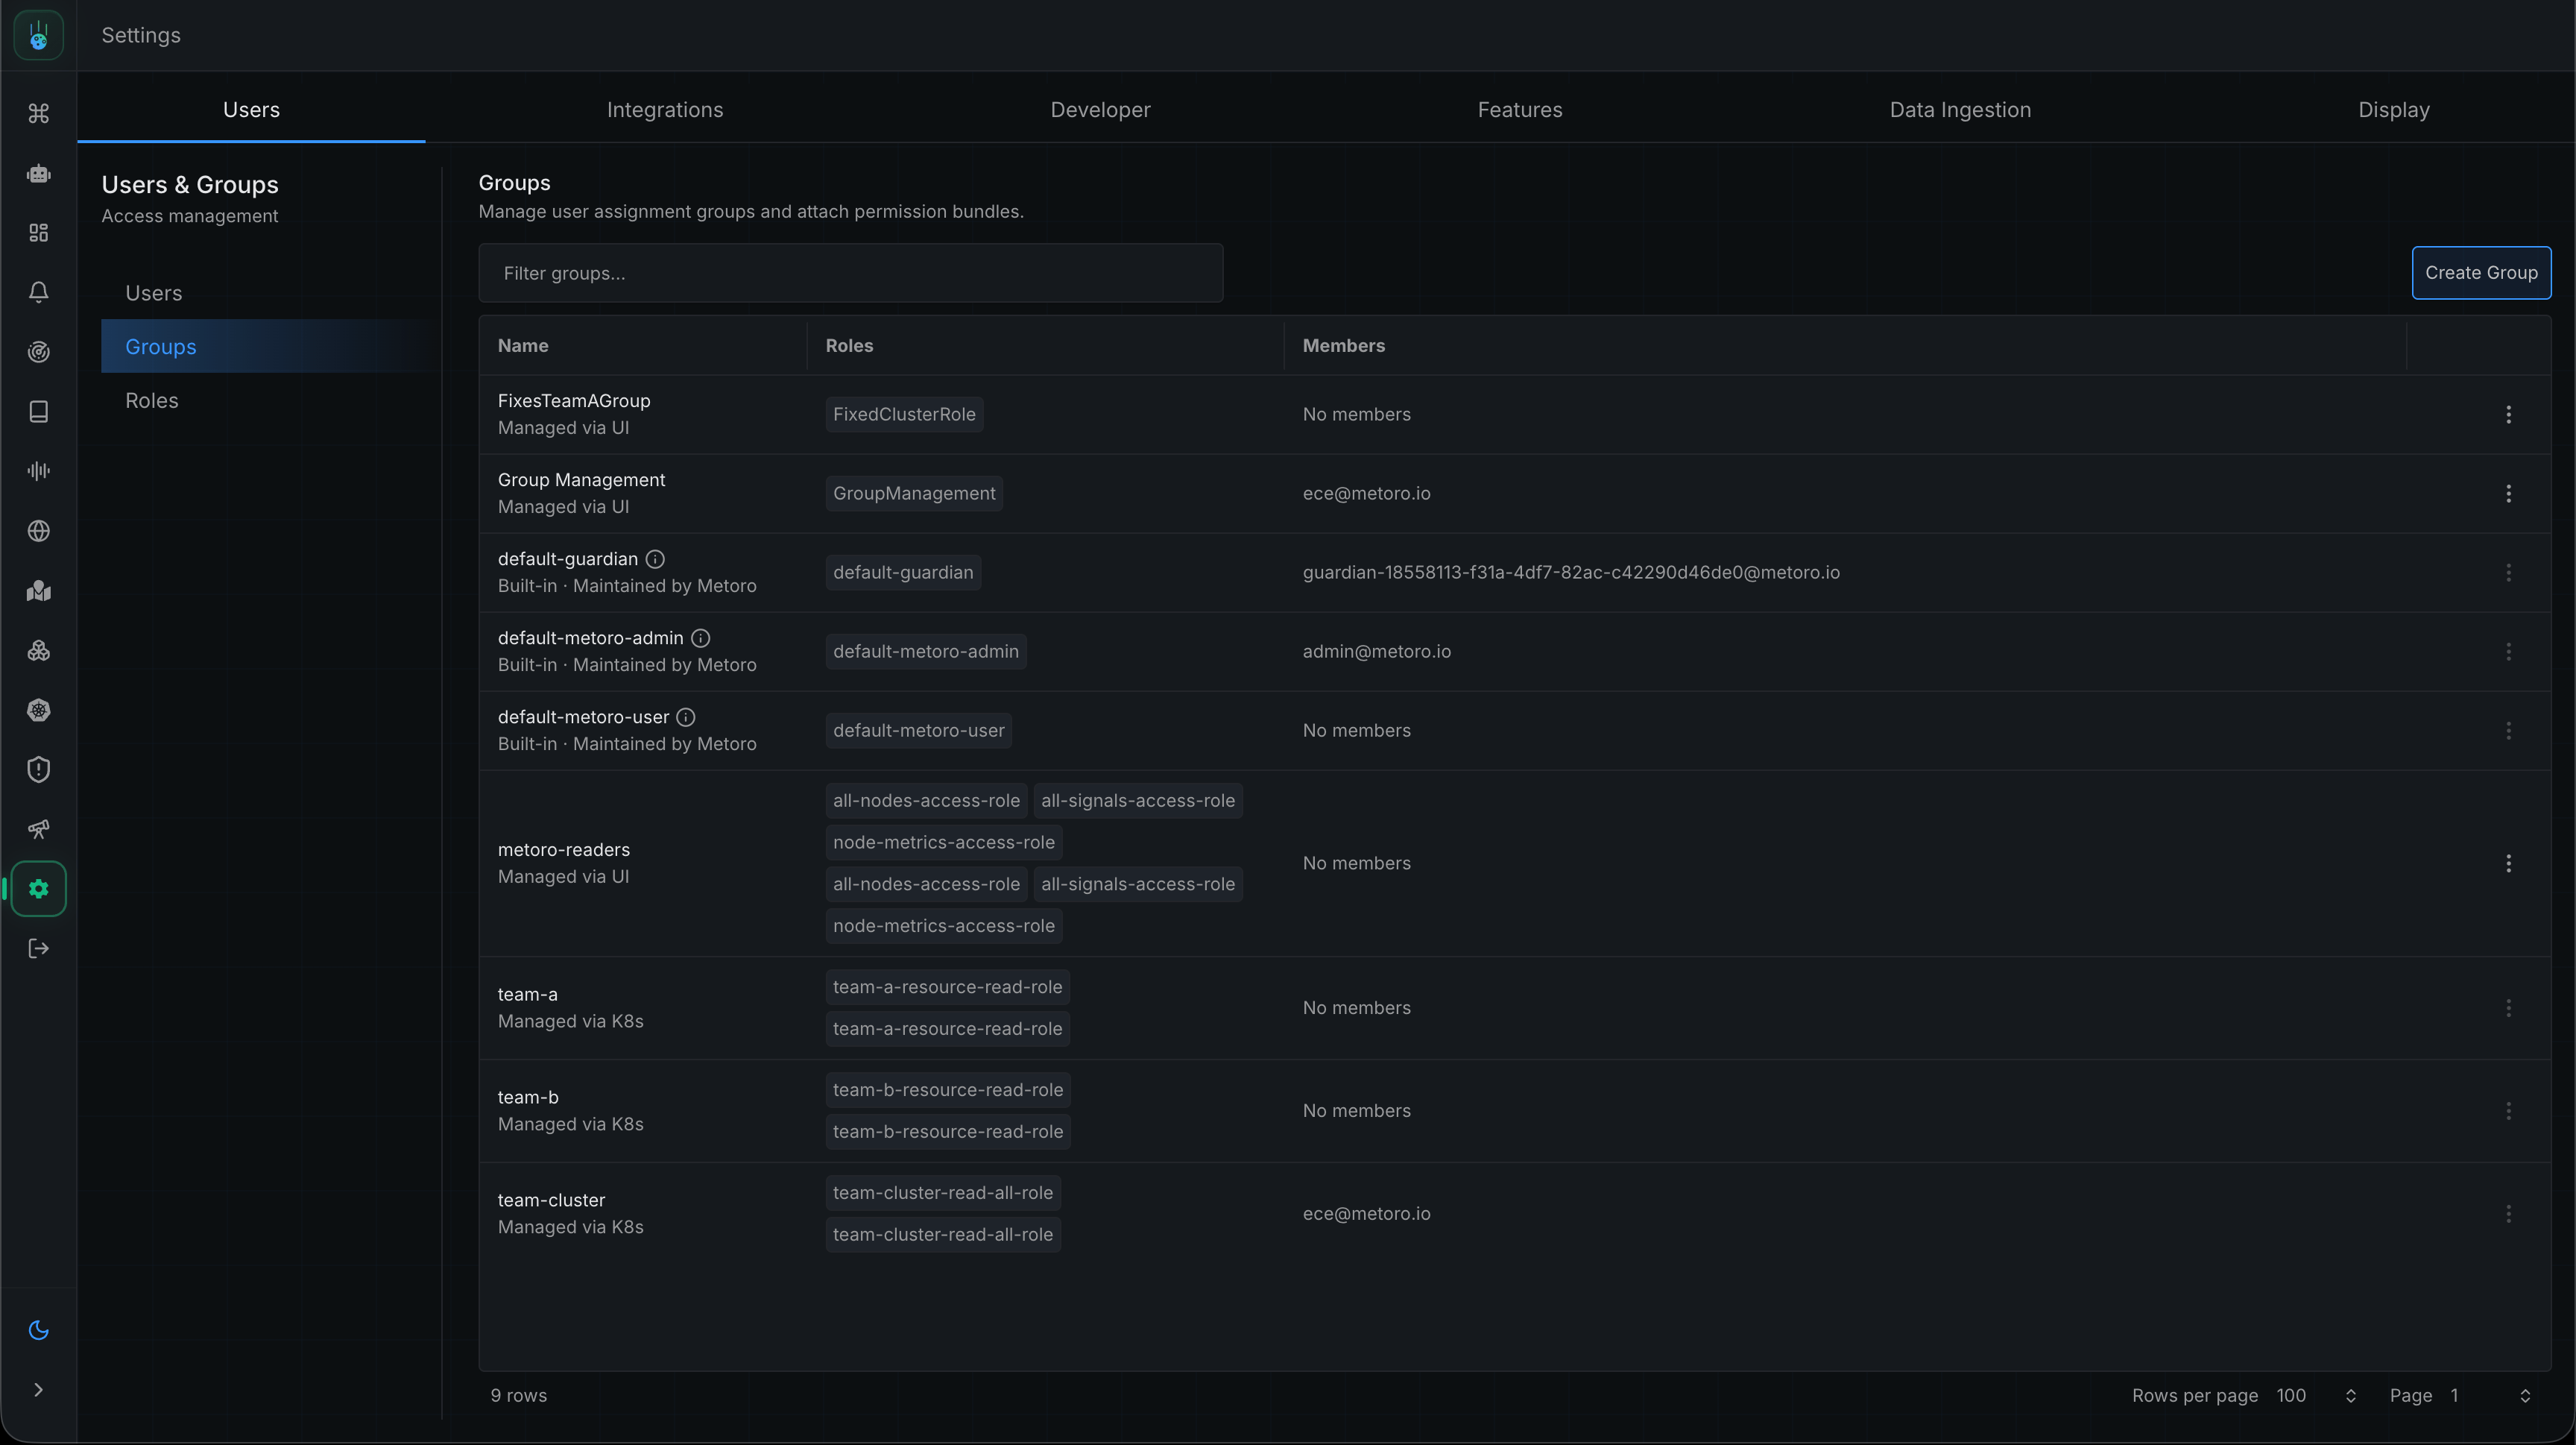
- Groups are collections of users. Groups are the only way access is assigned — roles are never attached directly to a user.
- Roles are bundles of permissions. A group can be bound to any number of roles.
- Permissions are the actual grants. They come in two types: resource permissions for Metoro resources (dashboards, alerts, webhooks, …) and telemetry permissions for observability data (logs, metrics, traces, …).
How access is evaluated
A user’s effective access is the union of every permission from every role of every group they belong to.- Permissions are allow-only and additive. There are no deny rules; adding a group or role can only ever grant more access, never remove it.
- Access is deny-by-default. If nothing in a user’s groups grants a permission, the user does not have it. In particular, a user with no telemetry grants sees no telemetry data at all. (The built-in roles include full telemetry access, so this only comes into play once you build custom roles.)
Users
The Users tab in Settings → Users & Groups lists everyone who has been created or invited in your organization.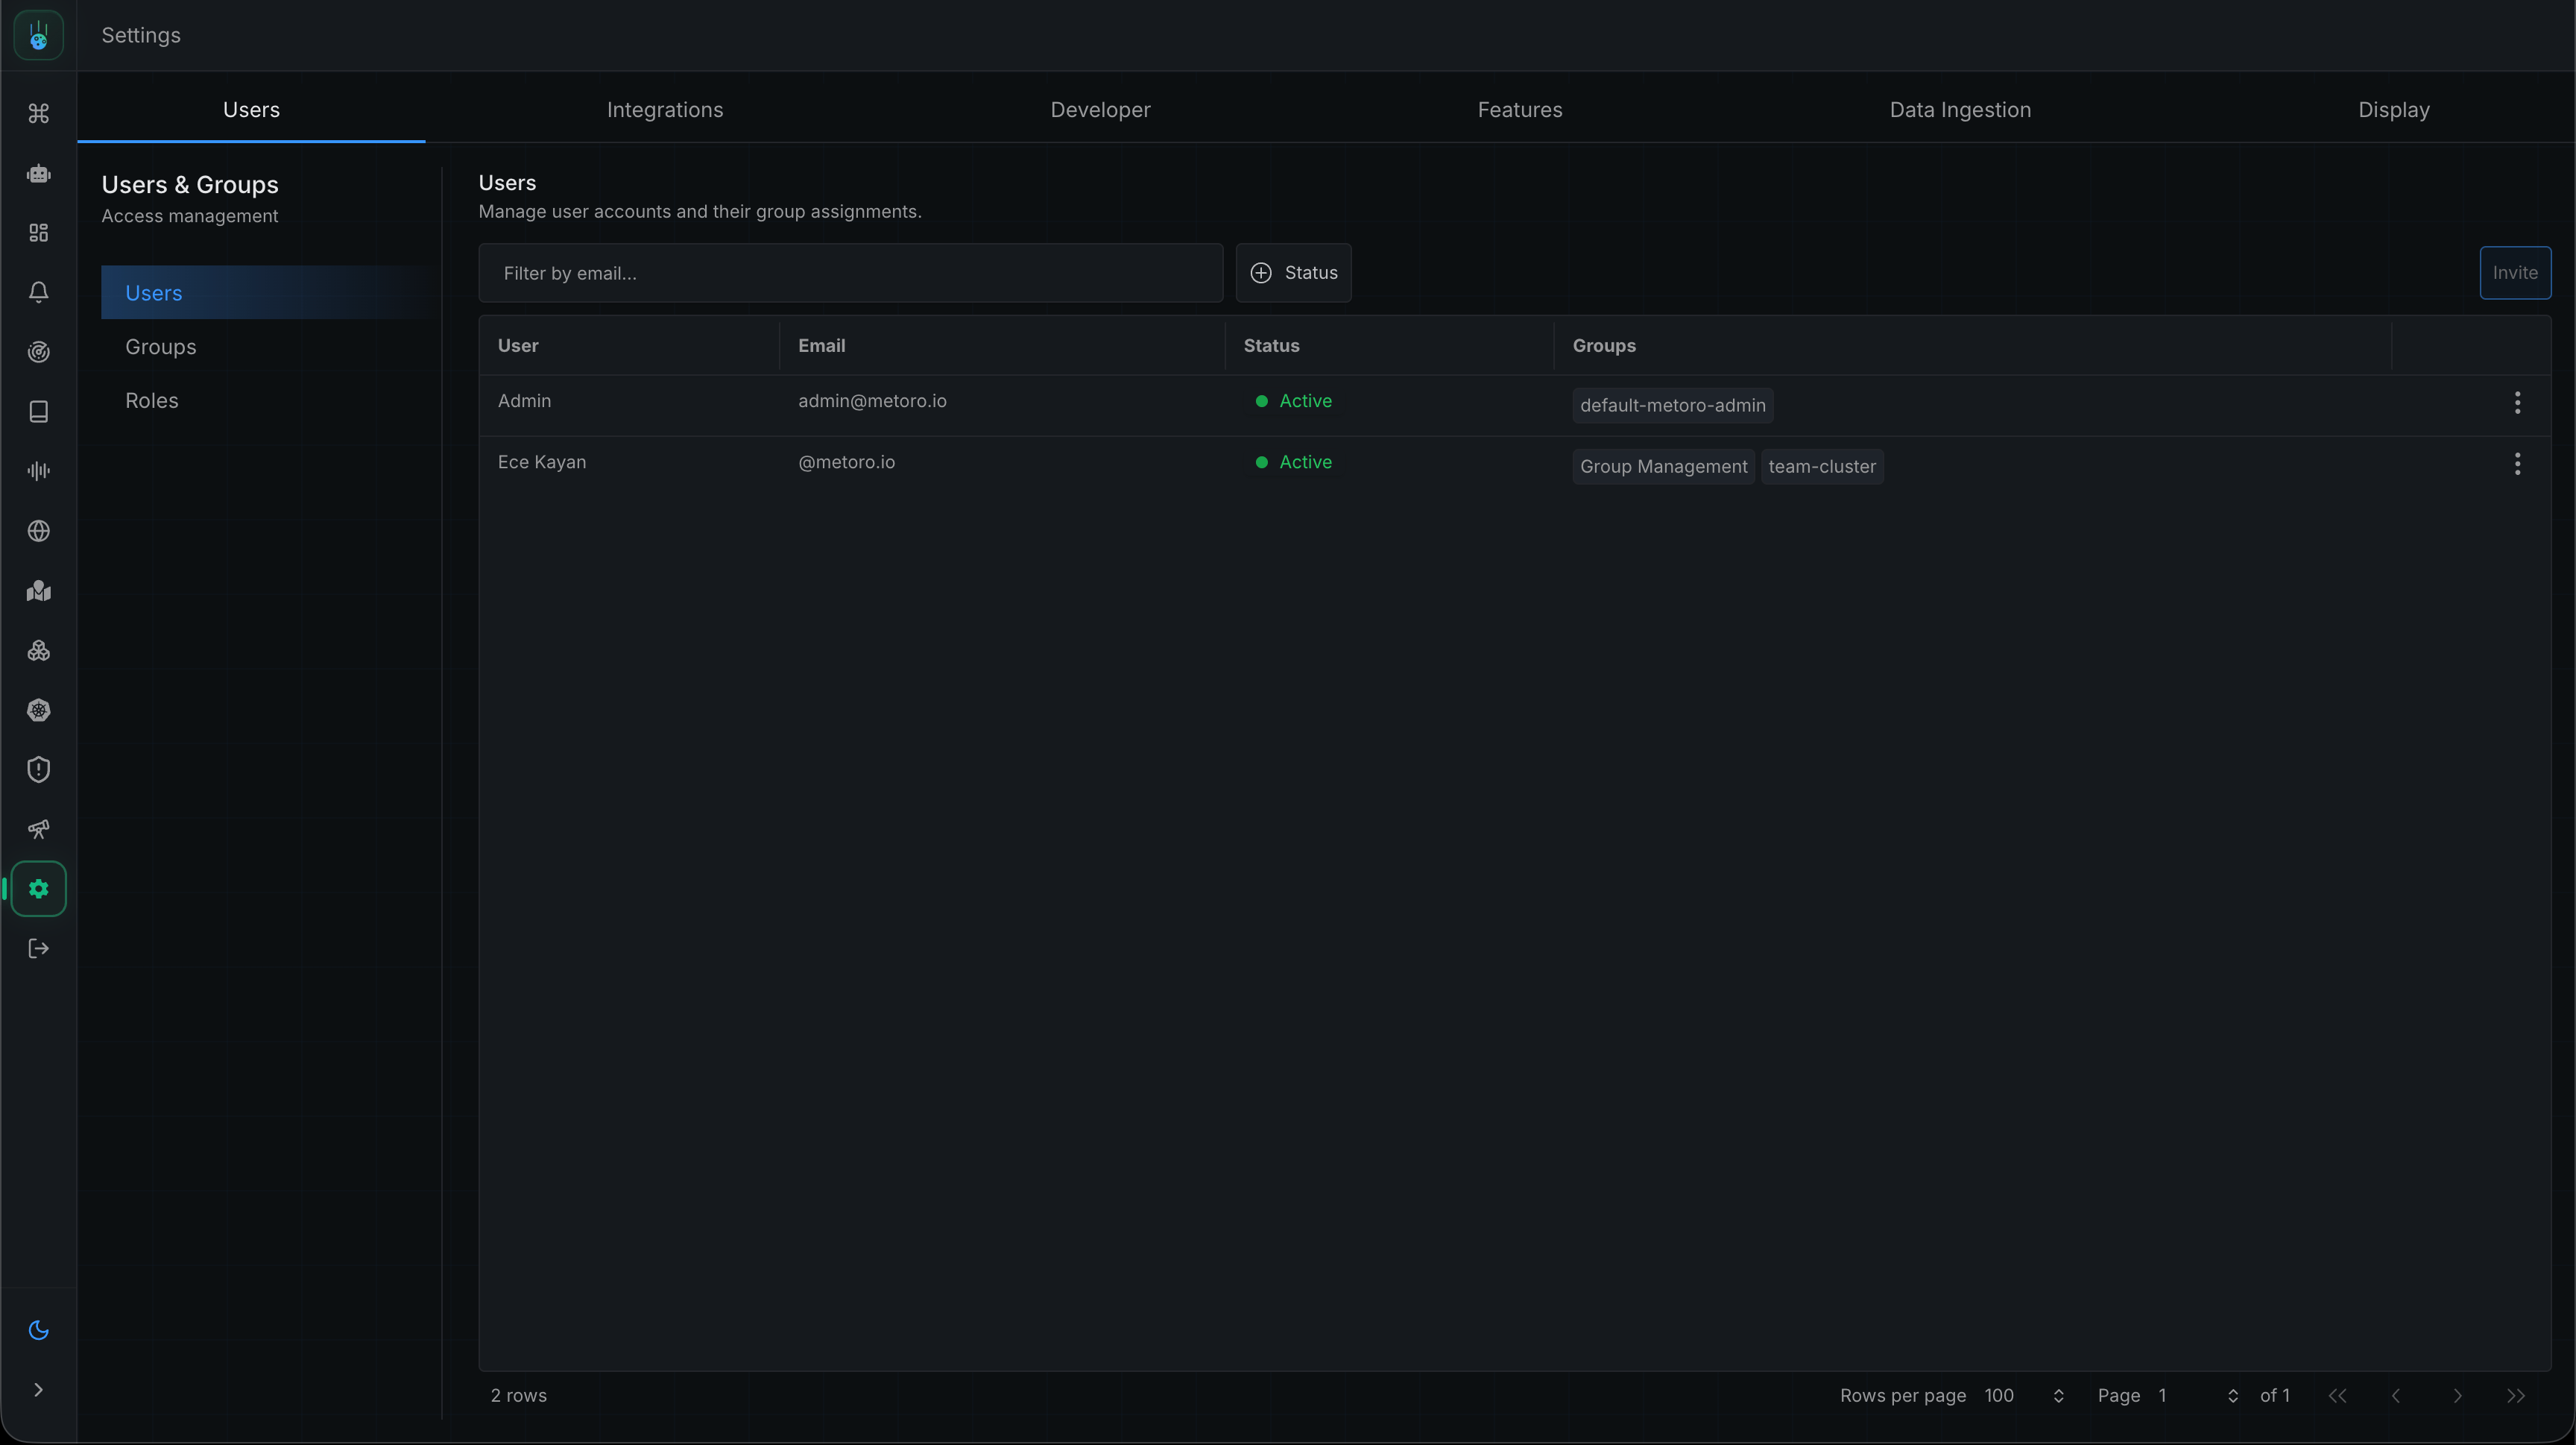
Managing users, groups, and roles requires
create, read, and update
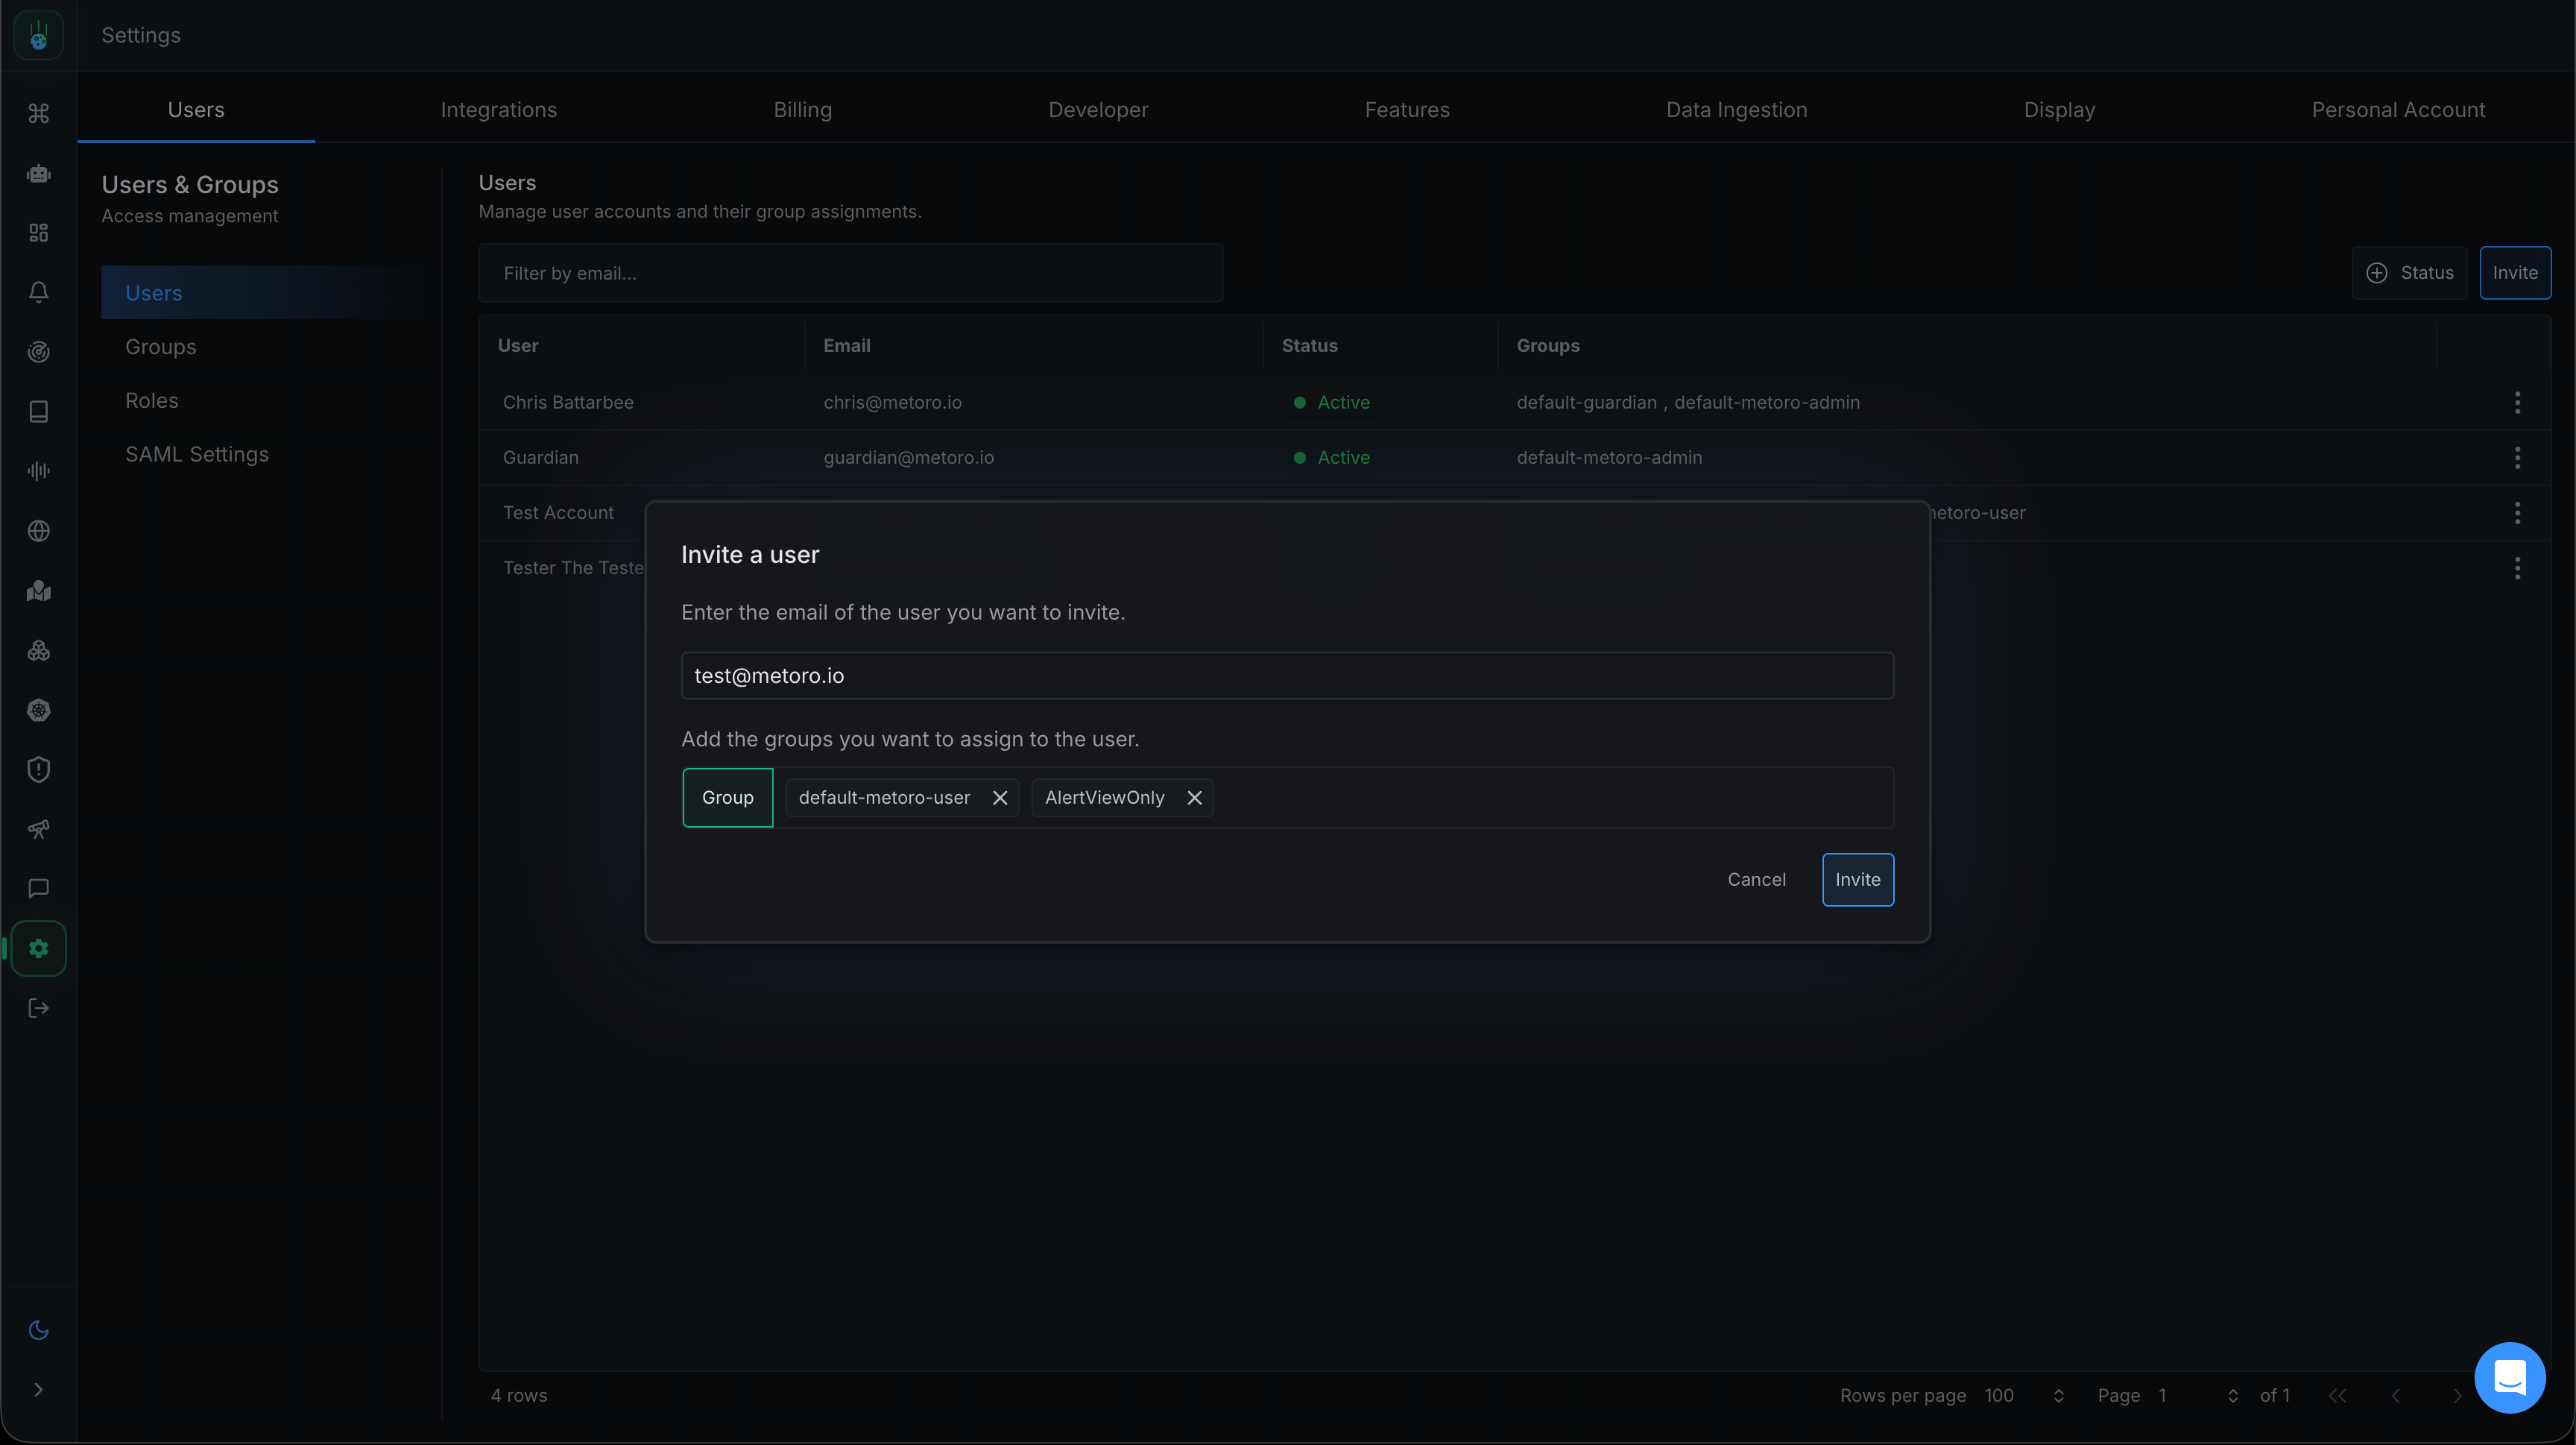
permissions on the accessManagement resource type.- Click Invite in the top right corner of the Users tab
- Enter the user’s email address
- Select the groups the user should join
- Click Invite to send the invitation
Groups
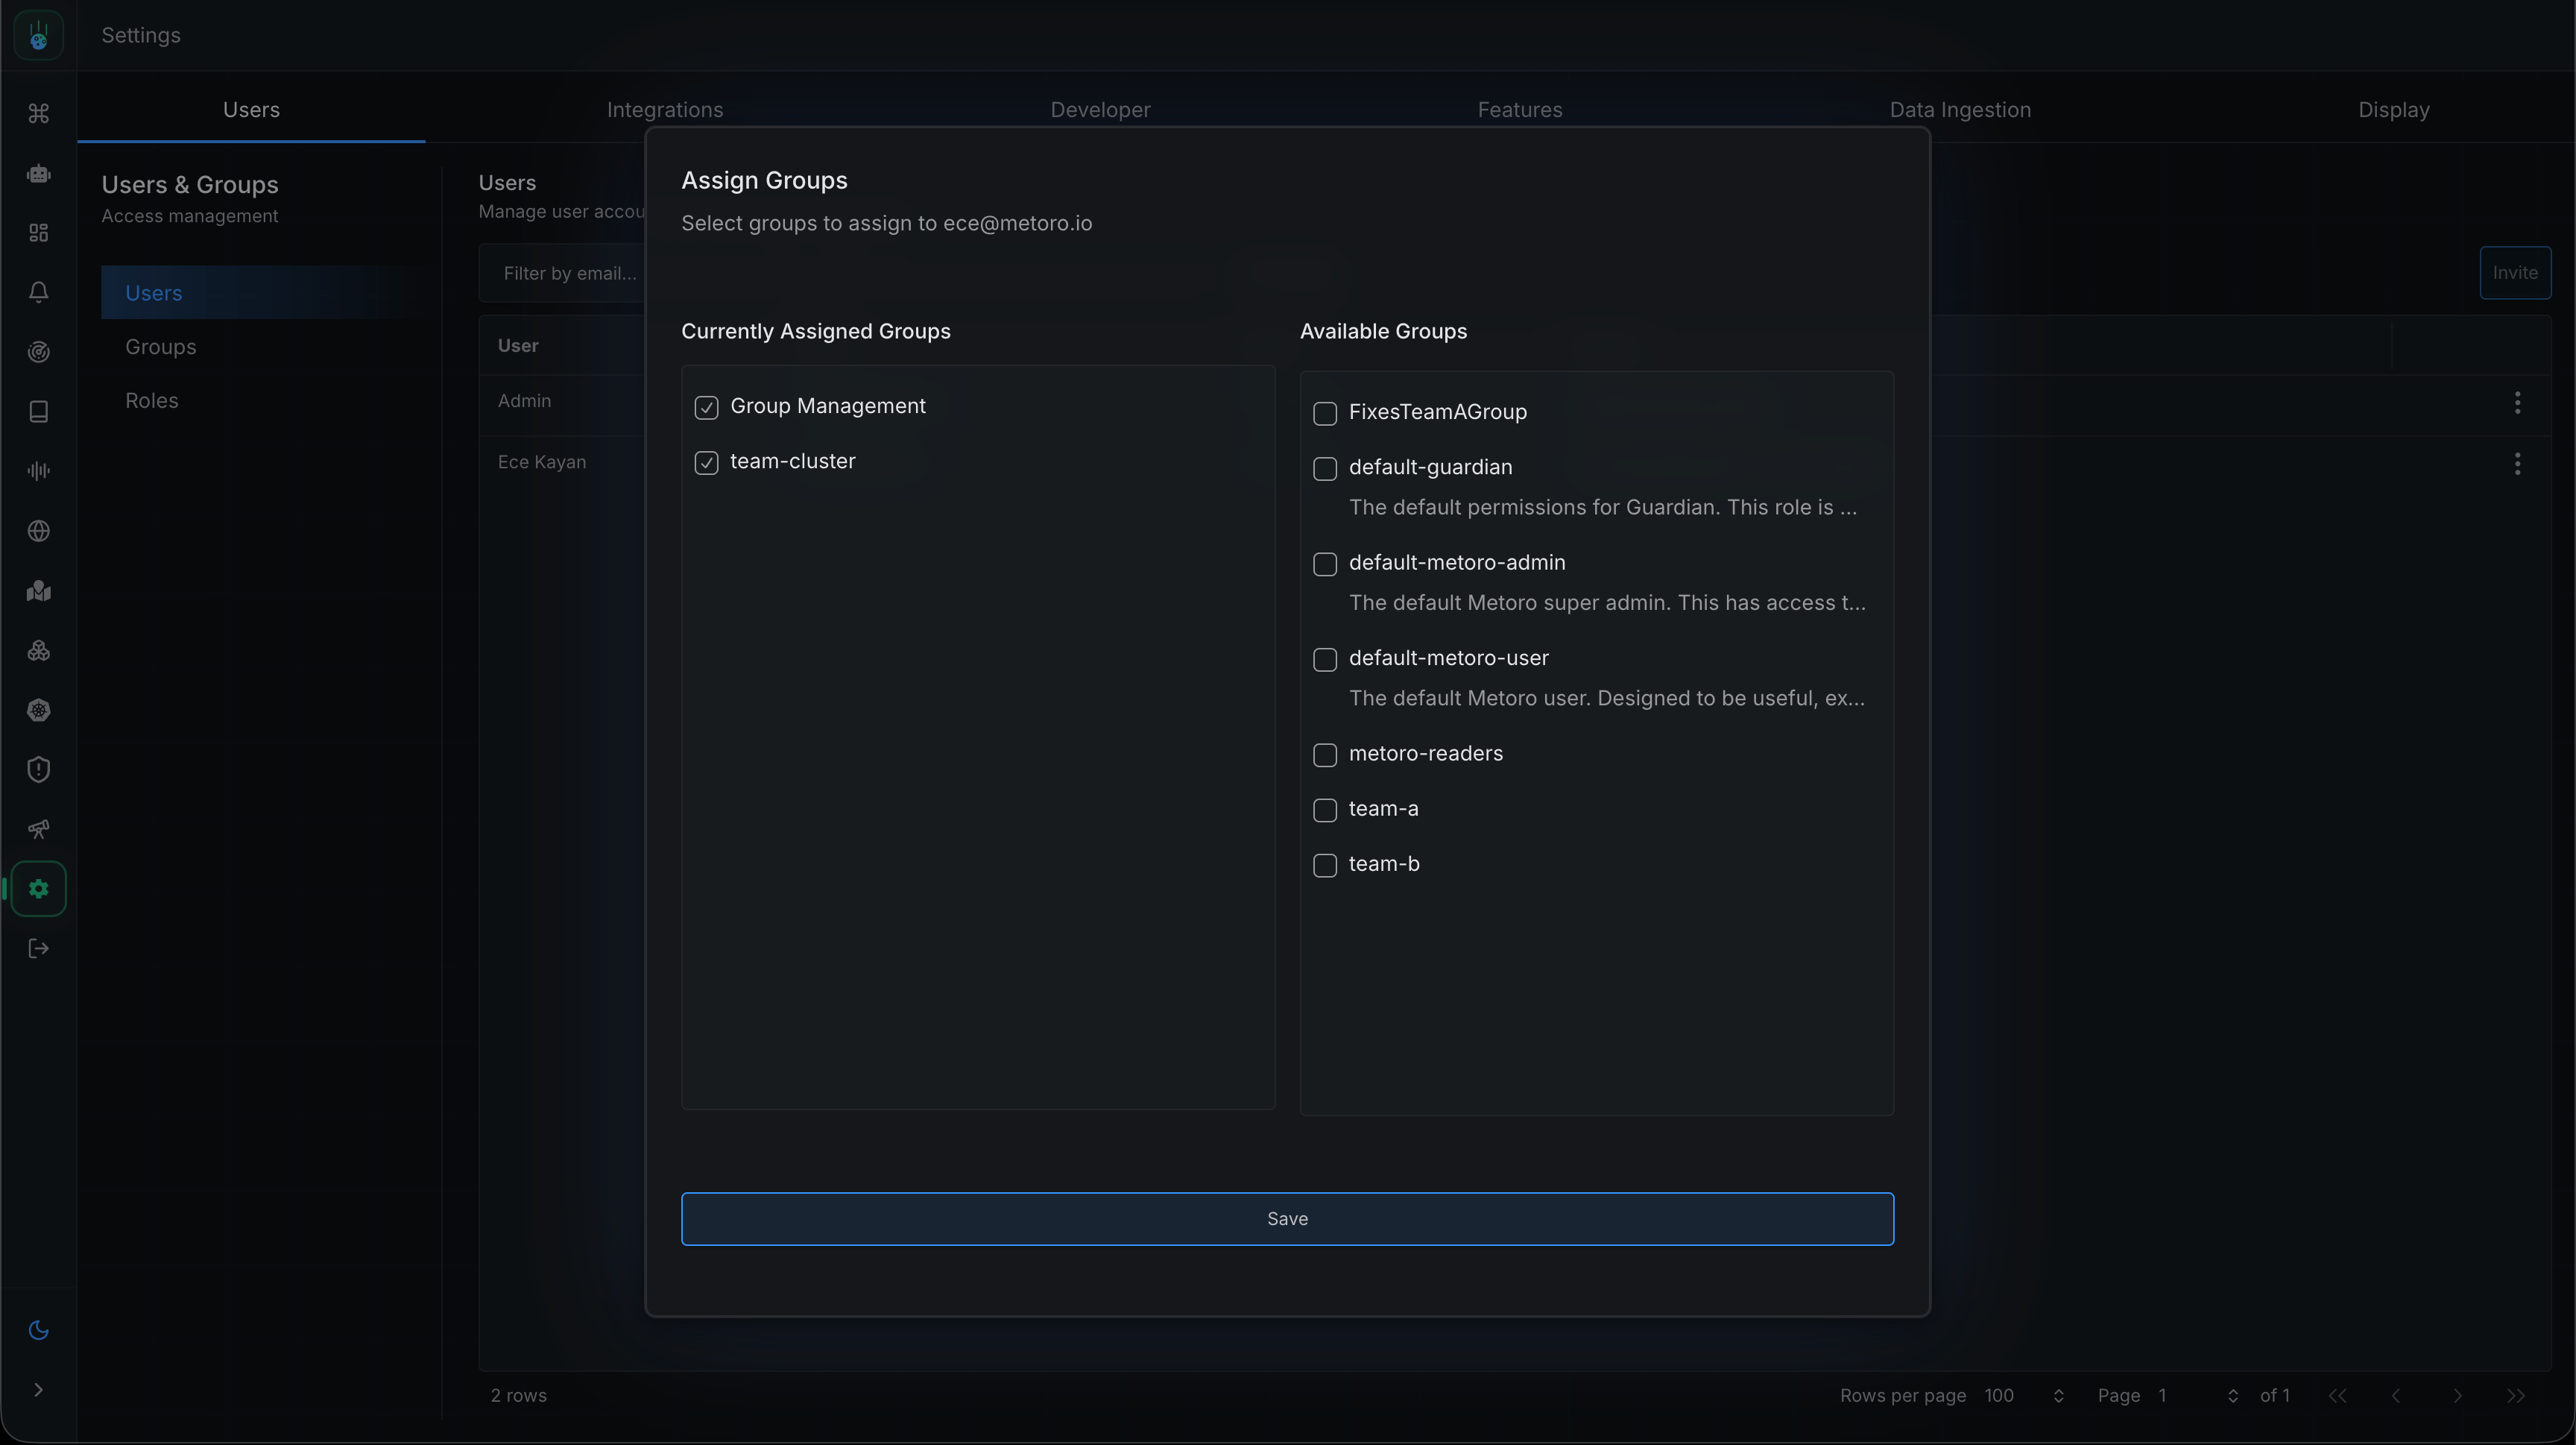
Groups connect users to roles. You can create them in three ways:- In the UI — the Groups tab in Settings → Users & Groups.
- From your identity provider — you can map IdP groups to Metoro roles so users are placed into the matching group automatically when they sign in via SSO. See Authentication.
- As Kubernetes resources — the
MetoroGroupcustom resource, on on-prem installs. See Kubernetes RBAC Resources.
Roles
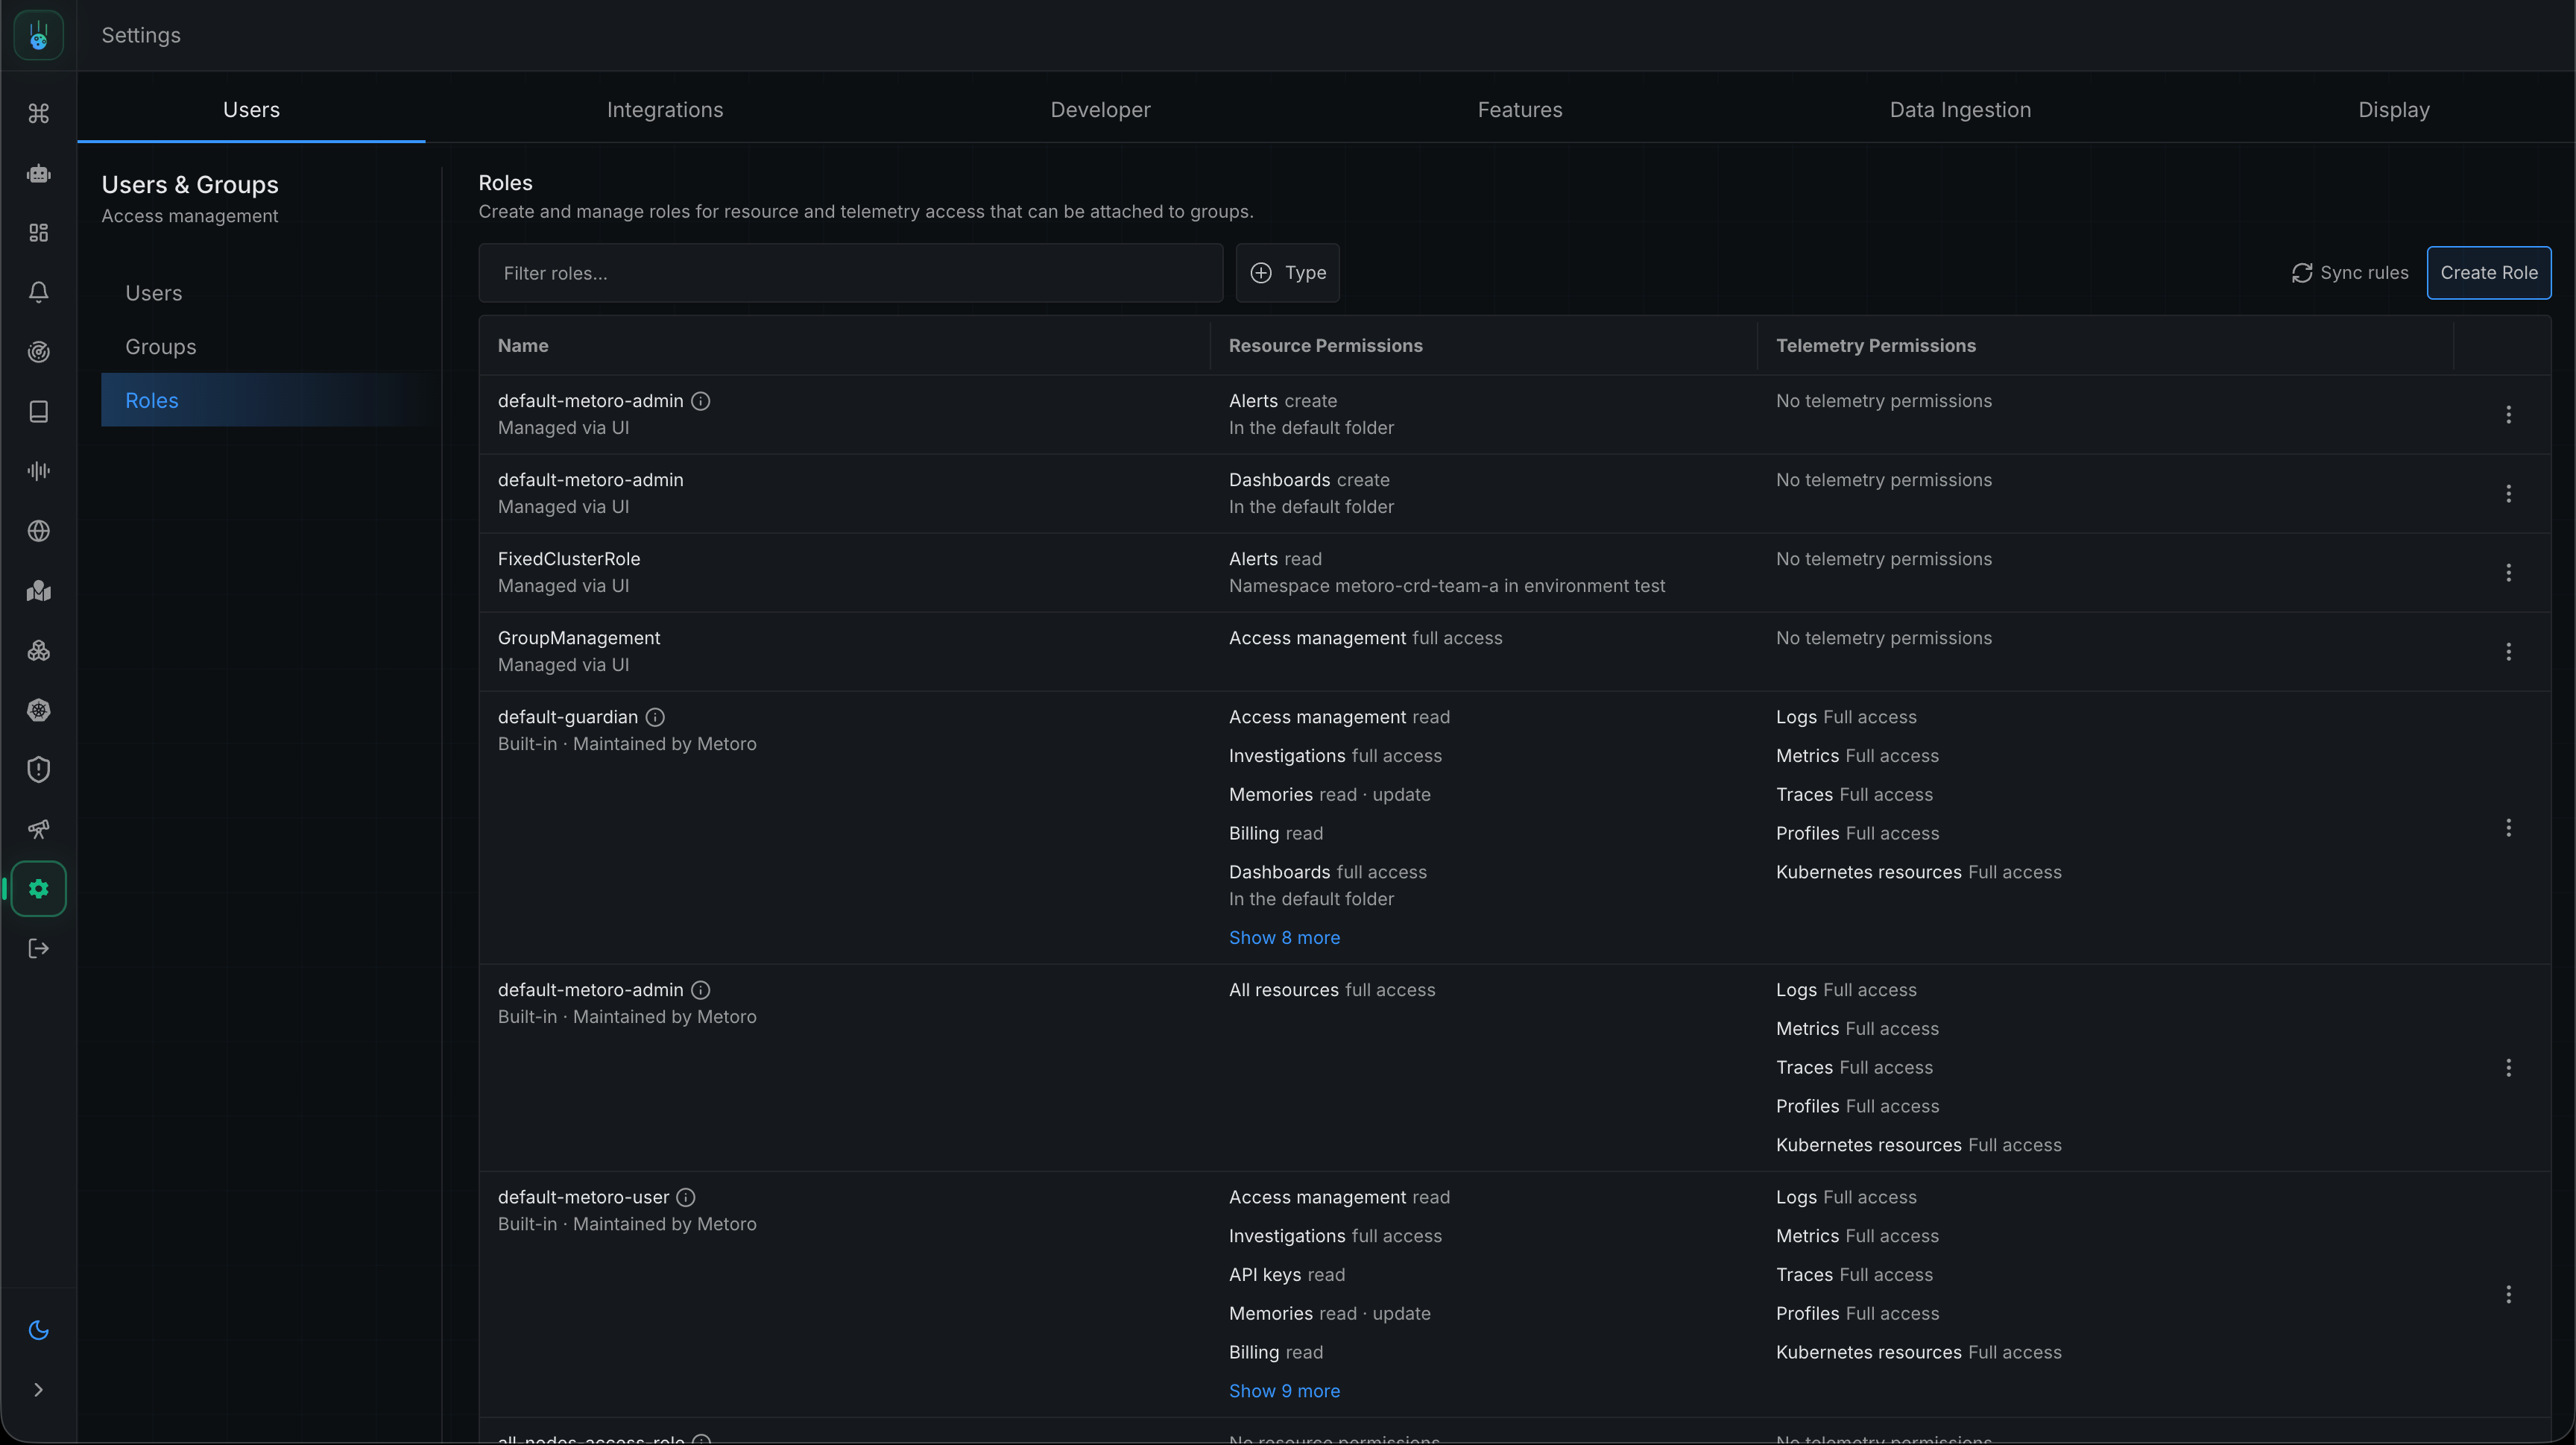
Roles are bundles of permissions. Metoro ships with two built-in roles:default-metoro-admin— full access to everything, including user management, integrations, billing, and settings.default-metoro-user— full access to observability data, but cannot modify integrations, cluster settings, users, or billing.
investigations resource, which gates Guardian AI output (AI issues, agent runs, and organization-wide Guardian conversations) — so users on the built-in roles see all Guardian features out of the box. Custom roles need the investigations resource granted explicitly to see Guardian output beyond the user’s own conversations. See Resource Types for details.
To create a custom role, open the Roles tab in Settings → Users & Groups and click Create Role:
- Use the Details tab to name and describe the role
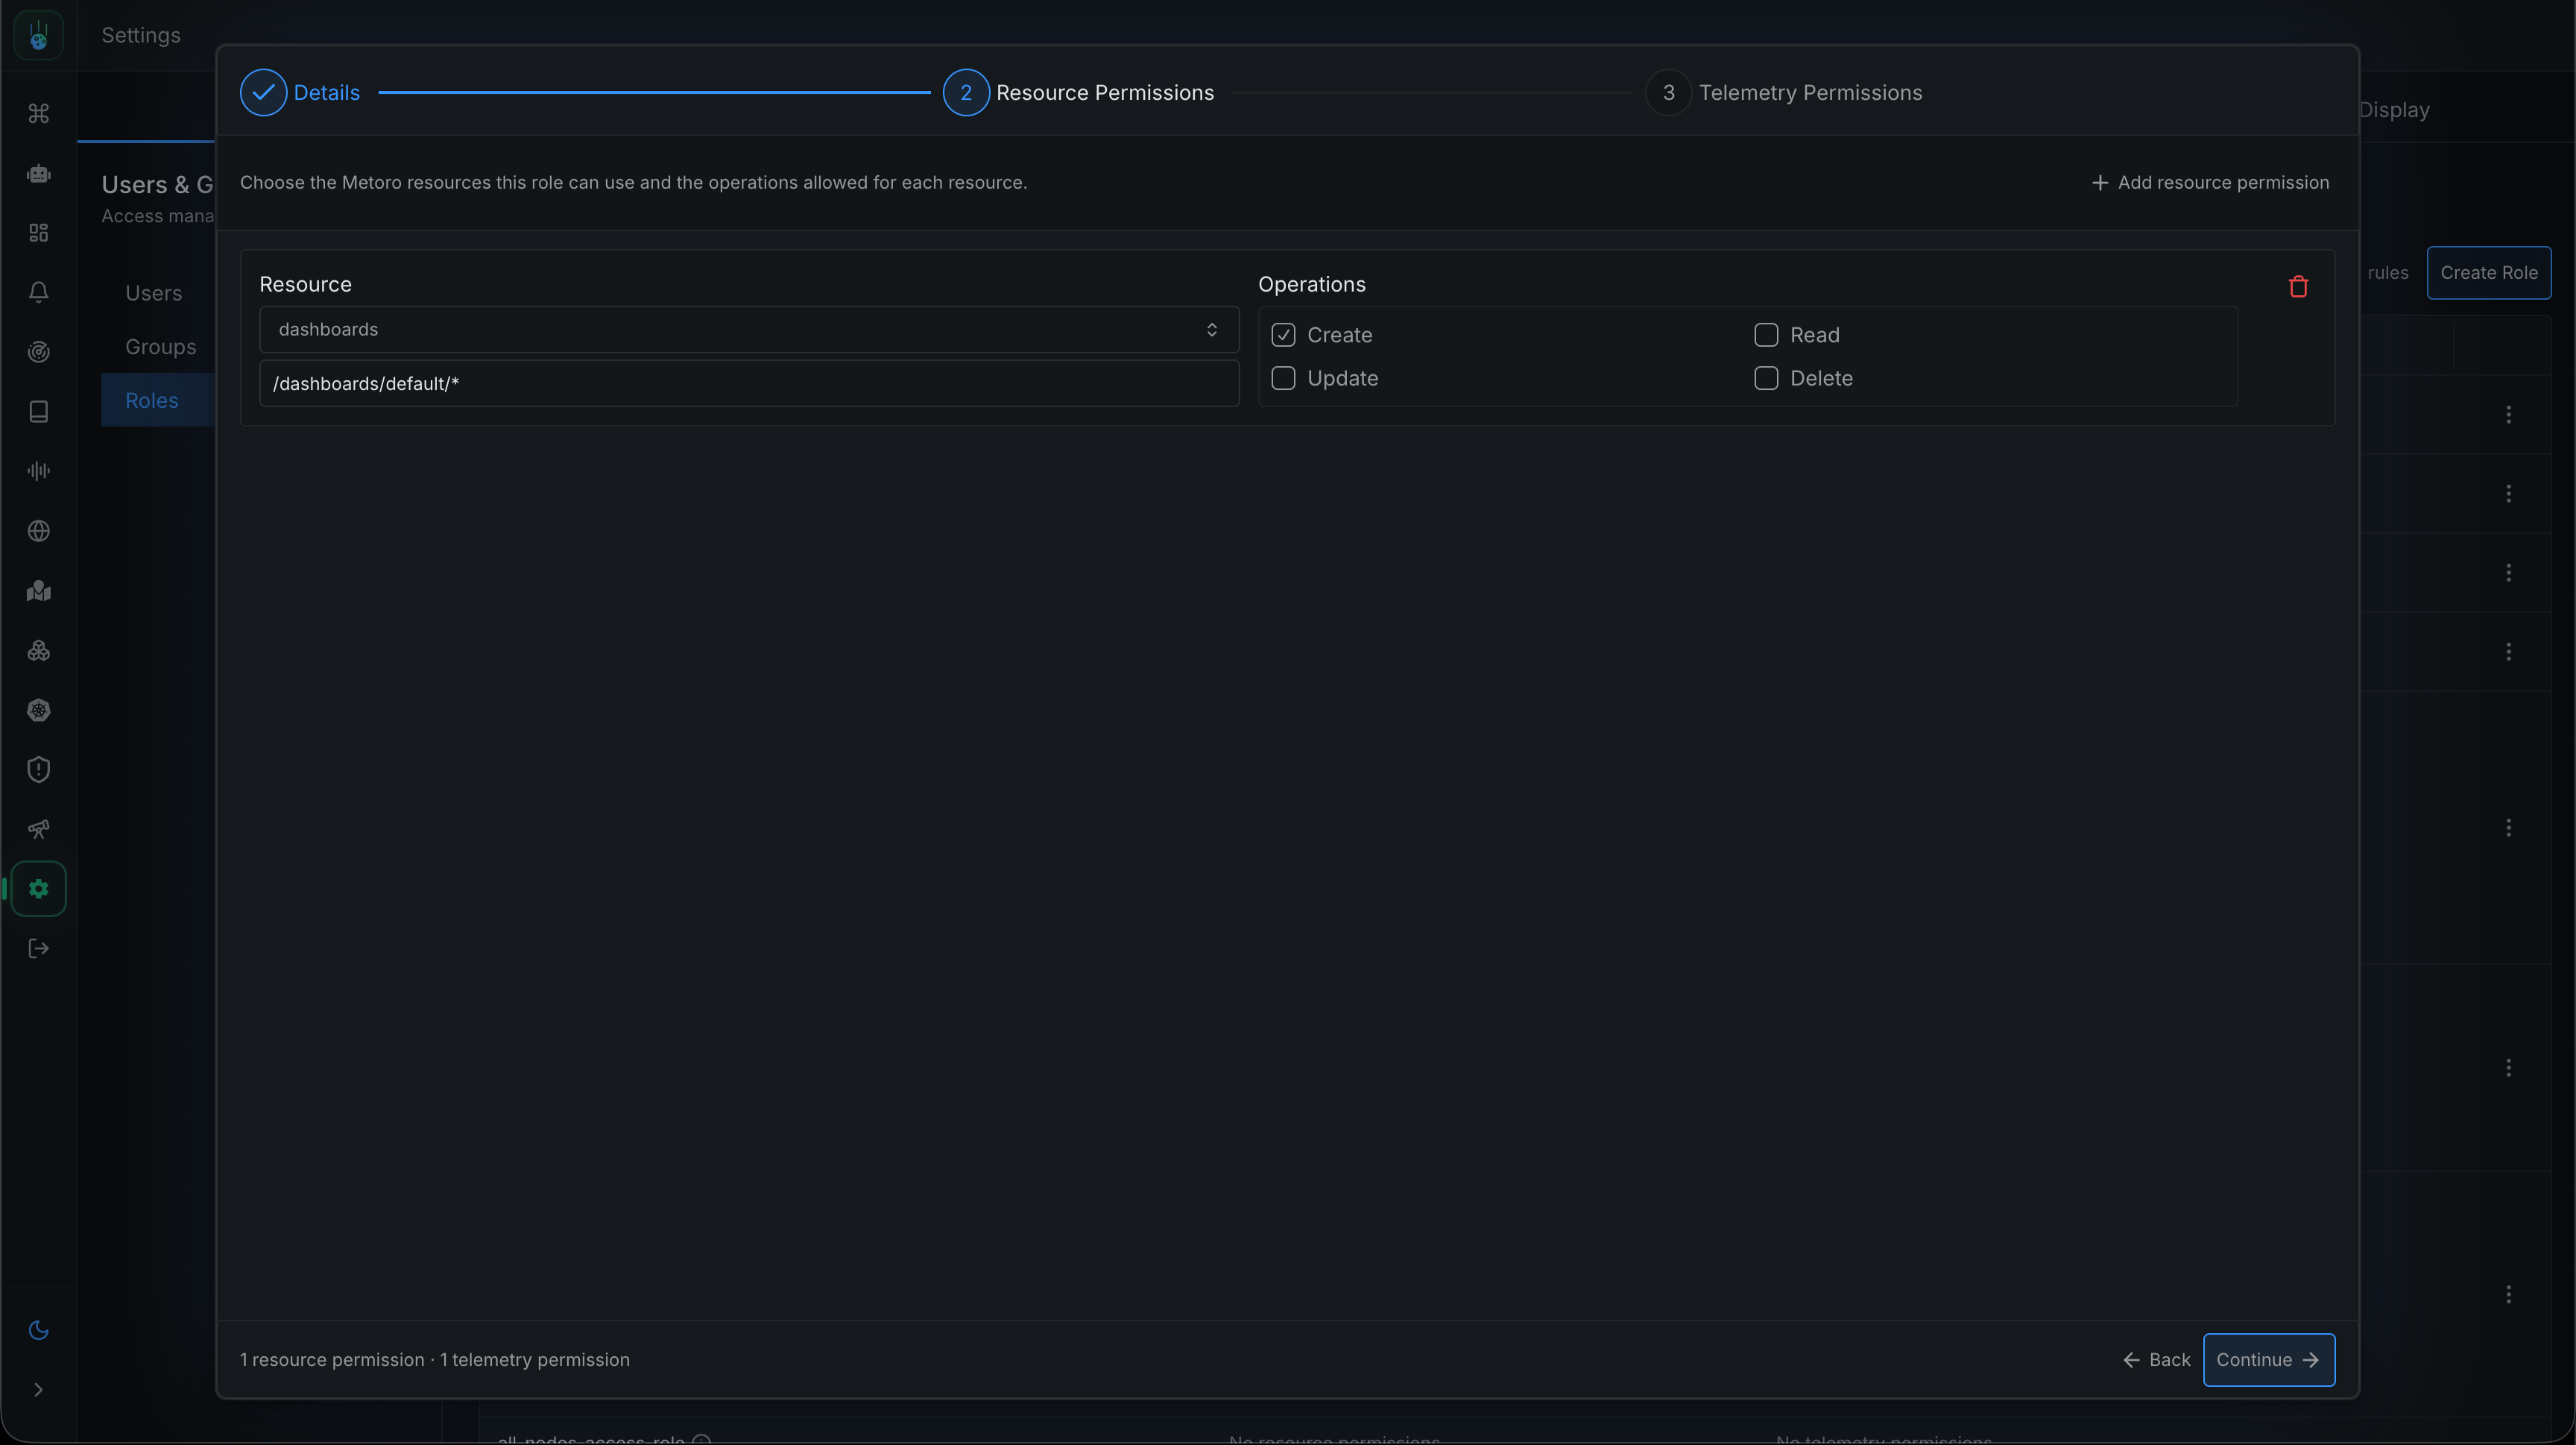
- Use the Resource Permissions tab to grant access to Metoro resources
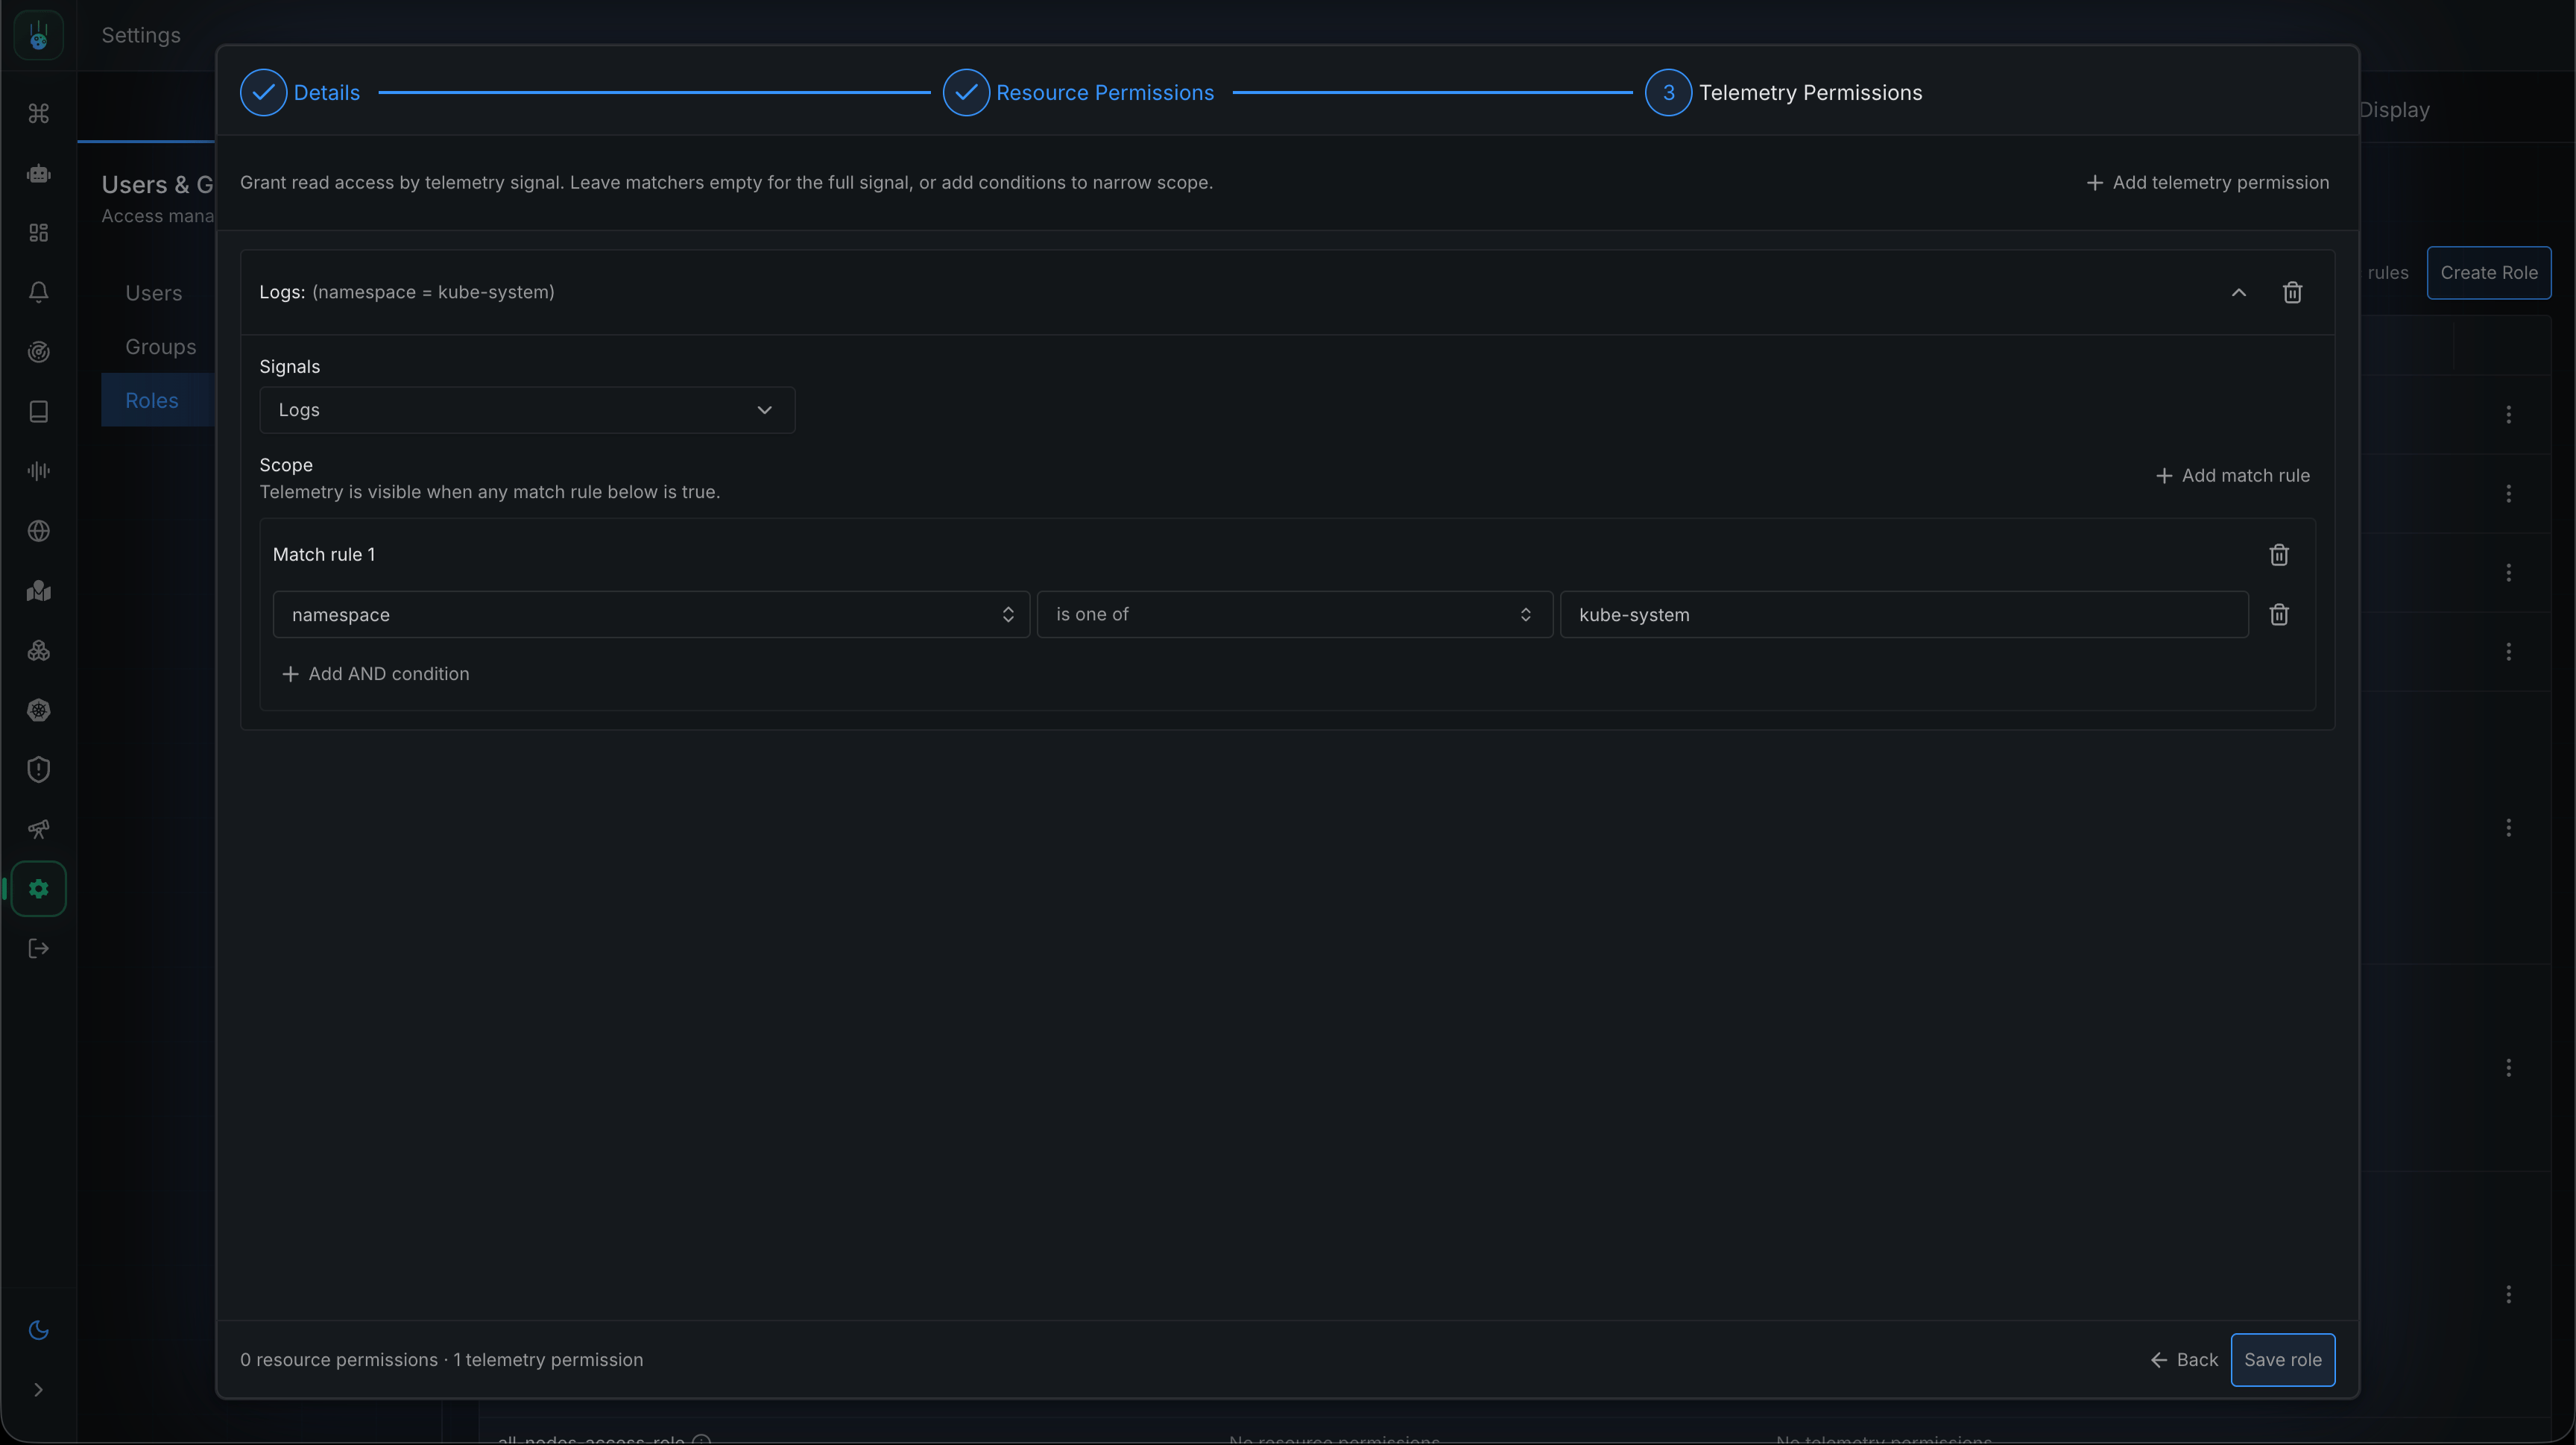
- Use the Telemetry Permissions tab to grant visibility into observability data
- Save the role, then bind it to groups from the Groups tab
Resource permissions
Resource permissions control access to Metoro resources — the objects you create and manage such as dashboards, alerts, and webhooks, as well as administrative areas like billing, integrations, and user management. Each permission is a resource type plus a set of verbs:
See Resource Types for the full list of resource types and what each verb means for them.
Path scoping
Some resource types — alerts, dashboards, and webhooks — are organized into folders, and permissions on them can be scoped to a folder path rather than the whole type. A path must start with the resource type’s root and usually ends in/* to cover everything beneath it:
/alerts/default/*— everything under the default alerts folder/alerts/default/team-a/*— only Team A’s alerts/dashboards/production/*— only dashboards in theproductionfolder/webhooks/kubernetes-managed/prod/payments/*— Kubernetes-managed webhooks from thepaymentsnamespace on theprodcluster/alerts/*— every alert folder
create lets a user add alerts or subfolders beneath the path (and move alerts into it), delete lets them remove alerts or empty folders (moving an alert out also needs delete on the source path). Users with access to a subfolder automatically see the minimal chain of parent folders needed to navigate to it, but not sibling folders they lack access to.
For example, a role that grants read and create on /alerts/default/team-a/*:
- lets the user view every alert under
team-aand create new alerts or subfolders inside it - shows
/alerts/and/alerts/default/in the sidebar so they can navigate toteam-a, but hides sibling folders like/alerts/default/team-b/ - does not let them edit or delete those alerts (no
updateordelete), or move an alert out ofteam-a— moving out also requiresdeleteon the source path
Telemetry permissions
Telemetry permissions control which observability data a user can query. Each grant covers one signal:logs · metrics · traces · profiles · kubernetesResources
A grant can cover the whole signal, or be narrowed with match expressions — conditions on telemetry attributes such as namespace, service.name, severity, or metric.name. Each expression is a key, an operator, and (for most operators) a list of values:
Expressions within one match group must all be true (they are ANDed). Separate grants are independent (they are ORed) — a user can query anything that at least one grant allows. For example, one grant can allow logs where
service.name is checkout-api, while another allows metrics whose metric.name matches ^node_.*.
The common scoping keys — environment, namespace, and service.name — work across every signal, so the same match expression applies no matter which signals a grant covers. Each signal also exposes its own attributes: for example metric.name for metrics, log.severity for logs, or server.namespace and client.namespace to match a specific side of a trace.
To manage telemetry grants in the UI, open the Telemetry Permissions tab when creating or editing a role, select a signal, and either leave the scope empty to grant the whole signal or add match groups to narrow it.
Kubernetes-managed access
Groups and permissions can be declared as Kubernetes custom resources instead of managed in the UI — useful for GitOps workflows where access control lives in version control next to the workloads it protects. Kubernetes-managed groups, roles, and grants appear in Settings → Users & Groups with a Managed via K8s label and are read-only in the UI, because the next sync would overwrite any manual edit. Metoro automatically detects creates,spec updates, and deletions for telemetry and resource rule custom resources. Most changes are reconciled in about 30 seconds; allow up to one minute for the exporter and sync workflow to process them. The Sync rules button remains available to force a full reconciliation if a rule change has not appeared after one minute.
See Kubernetes RBAC Resources for the full reference and worked examples.
Best practices
- Grant least privilege. Start from
readand add verbs as needed; scope telemetry grants to the namespaces and services a team actually owns. - Model groups on teams. One group per team, bound to the roles that team needs, keeps membership changes (people joining and leaving) separate from permission changes.
- Audit periodically. Review group memberships and role bindings from Settings → Users & Groups; Kubernetes-managed grants can be reviewed in version control.